September 25, 2012
Evernote and Skitch a Great Pair
Evernote has been a primary player in my digital toolbox for the past few years. It all began when I needed a tool to help organize my project notes when I was working as an educational software producer. I immediately found Evernote to be intuitive and very easy to search. With Evernote it is possible to capture pretty much anything. Another selling point for me was that I could also add to Evernote from my PC laptop, Android Phone, iPad, or even the web. I continued to promote the use of Evernote when I returned to working in the schools. I used Evernote to capture PD ideas, tech integration examples, conference notes, and so much more. Evernote continues to be part of my daily life.
In the variety of jobs that I have held throughout the years I have often relied on annotated screenshots to tell a story for PD materials, further explanation of a particular article, quick "how to" for myself/teachers, reminders, and multitude of other reasons. In the past I relied solely on using Jing to create all of my annotated screenshots. This changed when I started using my iPad. Jing is not available for the iPad so I had to start looking for alternatives.
About a year ago Evernote acquired Skitch. Skitch is a fabulous screenshot annotation tool that works seamlessly with Evernote and is available for all iOS and Android devices as well as Mac computers. I use Skitch all the time from my iPad. All of my Skitch screenshots are immediately filed in a folder within Evernote so I never have any trouble remembering where I saved them. I find that both Evernote and Skitch together make a very powerful tool for today's classrooms.
Check out how to get started with using Skitch.
Skitch as a teaching tool
June 1, 2012
A Picture is Worth 1,000 Words or Maybe More
| Skeletal System ThingLink Example |
Richard Byrne gives a short demo on how to use ThingLink.
There are many educational uses for ThingLink. I see this tool successfully integrated across the curriculum whether you are trying to build excitement when starting a new unit, activating prior knowledge, doing an author study in Language Arts, explaining the structure of a cell in Science, walking through the steps to solve a problem in Math, providing details for a map in Social Studies, and the list goes on. There are so many wonderful uses for this tool!
@AuntyTech has also compiled 27 Interesting Ways to Use ThingLink in the Classroom.
May 1, 2012
The Power of Educational Video
At least once a week a teacher will ask me where to find good educational videos. Here is a small sampling of the many great educational video sites that are out there:
Over 3,000 educational videos across the curriculum. Check out the NEW Teacher Resources section as well as the Common Core Map.

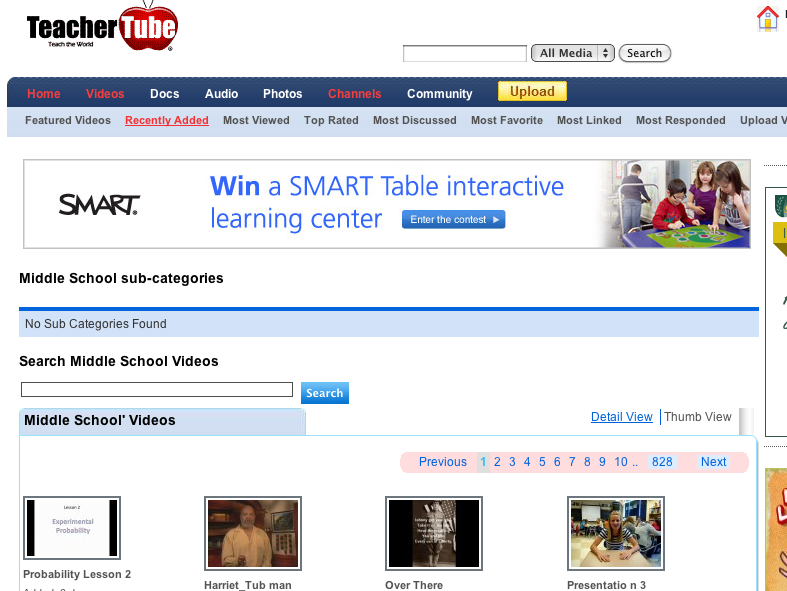
TeacherTube
This is a great place to find "how-to" educational videos.
This site provides access to many full-length PBS videos on many different topics including history, science, technology, and health.
This site contains educational content from around the world. The site also includes resources aligned to the Common Core.
March 29, 2012
Creating a Community with Edmodo
Edmodo is a free social network that can be used by teachers and students. It is a great tool for collaboration and can be accessed from any web-enabled device including smartphones and iPads.
Edmodo has many great features:
- Student accounts that do not require email addresses
- No games or advertisements
- Safe environment where the teacher controls who can join
- Ability to include files and links in a student/teacher generated post
- Share assignments with the class
- Create online quizzes
- Tag posts to better organize content
- Keep an online calendar or gradebook
- Organize classroom documents using the library feature
- Create small groups within a particular class for easier communication
Recently I had the opportunity to work with middle school English and French classes on two very different Edmodo projects. For the English class the students joined an Edmodo group as one of the main characters from the book they were reading. The students created journal posts in their character’s voice essentially producing an online diary. In French class students had the opportunity to join Edmodo to communicate with a partner classroom in France. Each of the two classes joined the same group in Edmodo giving the students the ability to communicate with each other while being safely managed by their two co-teachers.
To learn more about using Edmodo in your classroom check out Edmodo’s Help Center or the videos on the Edmodo SchoolTube channel. Edmodo also provides a series of webinars. To access the Edmodo app for mobile devices go to iTunes for the iPod Touch, iPhone, and iPad and Google Play for Android devices.
January 21, 2012
Microsoft Office in the Cloud
Recently I have been experimenting with cloud-based solutions for using Microsoft Office with my Mac, PC, and iPad.
This past week I downloaded the OnLive Desktop App to my iPad. The OnLive Desktop App provides users with a Windows 7 experience on the iPad. With this free application users are able to use Office 2010 Word, Excel, PowerPoint along with a handful of other apps like Paint and Notepad. After you sign in to your OnLive account you are taken to a virtual Windows 7 screen. From there you can start a new Office document from scratch or you can access any documents that you have uploaded to your OnLive account. You can access your account through a web browser and upload documents to your account from either a PC or a Mac. All your files are seamlessly synced to the OnLive servers and your free account gives you 2GB of storage.
Another great cloud-based solution for using Microsoft Office products is CloudOn. CloudOn is very similar to OnLive Desktop in what it has to offer. One difference is that CloudOn uses a DropBox account to sync your files to the cloud. CloudOn provides you with the same amount of online storage as OnLive since a free DropBox account gives you 2GB of space. Since I have DropBox already installed on my local machine I find it very easy to have my documents ready to use with CloudOn without having to log in to another account to upload docs. DropBox can also be easily accesed from a web browser.
The look and feel of the two programs is very different. CloudOn is more of streamed version of Microsoft Office while OnLive Desktop gives you the virtual feel of working in the Windows environment. CloudOn only offers Word, Excel, and PowerPoint where OnLive Desktop has some additional Microsoft Programs. Try out both and see which one works for you.
![]() |
| Photo Credit: zdnet.com |
![]() |
| Photo Credit: theiospost.com |
The look and feel of the two programs is very different. CloudOn is more of streamed version of Microsoft Office while OnLive Desktop gives you the virtual feel of working in the Windows environment. CloudOn only offers Word, Excel, and PowerPoint where OnLive Desktop has some additional Microsoft Programs. Try out both and see which one works for you.
September 8, 2011
Lending and Borrowing Kindle eBooks
![]() |
| Photo Credit: Jon Davis |
In past summers my sister and I would exchange boxes of books to share with each other. This summer was different because we were both Kindle owners. If you are a Kindle owner there are several great ways to lend and borrow eBooks with friends, family, or complete strangers.
In October of 2010 Amazon began allowing Kindle users to borrow and lend eBooks from other Kindle users. Each Kindle book that a user owns can be loaned once for a period of 14 days. The person that you loan the book to does not need to have a Kindle to read the book. All that is needed is the free Kindle reading application that can be downloaded to a computer, cellphone, etc.
How it works - When you lend someone an eBook it is downloaded from the Amazon site to the "borrower's" device for the 14 day period. After the 14 day period expires then the book is deleted from the borrower's device and is again available on your own device again. Note: not all publishers allow lending of their book titles. Use your Amazon account to begin lending eBooks.
If you are a Kindle user that is looking for other great ways to borrow and lend books check out the following:
ebookfling.com - This site allows Kindle users to lend and borrow books for a 14 day fling. Borrowing books works on a credit system. If you lend a book you are issued one credit. You can then use your credit to borrow a book from someone else. You also have the option to purchase additional credits for 2.99 each. If you are feeling generous you can also gift credits to other users.
BookLending.com - This site also allows Kindle users to lend or borrow eBooks for a 14 day period. This site is programmed to reward really active lenders by allowing them to borrow books before other less active users.
Kindle Library Lending (coming soon!) - Amazon announced in April of this year that it is partnering with OverDrive to give Kindle users (or any device with the Kindle reading app) the ability to check out eBooks from their local library.
July 16, 2011
Flipping over the Flipboard App
![]() |
| Photo Credit: Gizmodo |
At first I primarily used the App for catching up on Facebook and Twitter feeds. Now I regularly use the App to read my Google Reader RSS feeds, technology news from sites like Gizmodo and Cult of Mac, education updates from sites like MindShift and Education Week, as well as a multitude of travel and entertainment content.
Recent updates to the Flipboard App (v. 1.5) now include a new Content Guide for easily browsing specific topics and categories, the ability to have unlimited favorites, a streamlined way to read full articles, and more. Another great plus to the Flipboard App is that it is absolutely free!
May 31, 2011
Summer Learning
![]() |
| Photo Credit: Dreamstime |
This summer I plan to take an online course that focuses on better ways to aggregate information to allow for more efficient evaluation, synthesis, and sharing of information. The problem with easy access to information is that it can also be completely overwhelming. I am looking forward to learning about new ways to tackle the ever growing amount of information that I have subscribed to.
For others you may also be taking a class this summer or exploring some other professional opportunity. If you are looking for free online events and courseware there's a lot available this summer. Check out some of the following opportunities:
Classroom 2.0 Live Events
The Future of Education
SimpleK12 Webinars
MIT Open Courseware
The 23 Things Web 2.0 Project
Edutopia Professional Development Blog Series
Reform Symposium E-Conference - Friday, July 29 - Sunday, July 31, 2011
April 4, 2011
Google Tools to Support Bloom's Revised Taxonomy
Over the years I have used many different Google tools for myself as well as with teachers and students. My experiences with Google tools started small but has grown to include many areas of both my personal and professional life. The biggest impact I have seen this year is how Google tools have successfully supported classroom learning objectives.
Most recently I worked with tenth graders who were using Google Sites for a biology project. Each team of students was able to collaborate on a given site as well as to link to their shared Google Docs. Students also found it easy to incorporate media from Picasa and other online sources.
This past week I was excited to find a resource that Kathy Schrock assembled that showcases Google tools to support Bloom's Revised Taxonomy. This resource is an interactive graphic that provides links to Google tools as each level of Bloom's Revised Taxonomy. I was surprised by how many tools on the list were new to me. This is a fabulous resource for any classroom teacher that uses Google tools.
To read more about why Kathy Schrock to put this resource together check out her blog.
Most recently I worked with tenth graders who were using Google Sites for a biology project. Each team of students was able to collaborate on a given site as well as to link to their shared Google Docs. Students also found it easy to incorporate media from Picasa and other online sources.
This past week I was excited to find a resource that Kathy Schrock assembled that showcases Google tools to support Bloom's Revised Taxonomy. This resource is an interactive graphic that provides links to Google tools as each level of Bloom's Revised Taxonomy. I was surprised by how many tools on the list were new to me. This is a fabulous resource for any classroom teacher that uses Google tools.
To read more about why Kathy Schrock to put this resource together check out her blog.

March 4, 2011
Skype in the classroom
Skype in the classroom was recently released in beta. This is a great way to introduce Skype to students.
Skype in the classroom provides a directory of teachers who are looking to make a connection with classrooms and teachers around the world. This site also provides a resource area where teachers can share exemplars as well as other project ideas. Teachers can search the directory and resource area by choosing categories that best apply to them. This is a great starting point for teachers interested in trying out Skype with their classes.
February 11, 2011
Free Online Drawing Tool
Draw Island is a free online drawing tool that was just recently released in Beta. What I like about this drawing tool is its simplicity!
It gives you four standard canvas sizes to pick from or you can create your own custom size with a max of 2000 x 2000. The drawing tools are very easy to use and you can choose different colors, line thickness, etc. Another feature of Draw Island is being able to create simple animations. Finished drawings and animations can easily be downloaded to your local computer.
Draw Island does not require an account so no email address is necessary. This makes it even more appealing at the elementary and middle school levels.
Students can use this tool to create drawings for digital presentations. This tool could also be useful for demonstrating math or science concepts.
It gives you four standard canvas sizes to pick from or you can create your own custom size with a max of 2000 x 2000. The drawing tools are very easy to use and you can choose different colors, line thickness, etc. Another feature of Draw Island is being able to create simple animations. Finished drawings and animations can easily be downloaded to your local computer.
Draw Island does not require an account so no email address is necessary. This makes it even more appealing at the elementary and middle school levels.
Students can use this tool to create drawings for digital presentations. This tool could also be useful for demonstrating math or science concepts.
January 7, 2011
Google Body Browser
Note: Google Body is now Zygote Body 6/01/12
Google has released a new 3-D tool, the Google Body Browser! The Google Body Browser allows users to explore the human body similarly to how users can explore the world in Google Earth. The only way to access the Google Body Browser is by using a Web-GL enabled browser like Google Chrome 9 Beta or Firefox 4 beta. Web-GL brings 3D to the web without needing a plug-in.
This Google Labs project gives users the ability to rotate a virtual body, peel back layers of the body, as well as zoom in an out of various parts and systems within the body.
Google has released a new 3-D tool, the Google Body Browser! The Google Body Browser allows users to explore the human body similarly to how users can explore the world in Google Earth. The only way to access the Google Body Browser is by using a Web-GL enabled browser like Google Chrome 9 Beta or Firefox 4 beta. Web-GL brings 3D to the web without needing a plug-in.
This Google Labs project gives users the ability to rotate a virtual body, peel back layers of the body, as well as zoom in an out of various parts and systems within the body.
November 19, 2010
The Educational Value of Google Forms
Recently a teacher asked me for a program recommendation that would allow students to create a survey or a quiz while also providing immediate feedback. The teacher also wanted to be able to embed the surveys/quizzes on a class wiki.
For this project I suggested the use of Google Forms. The great thing about Google Forms is that you can see the results of your survey/quiz in real time. The results are automatically compiled in a Google spreadsheet.
Below is an example of a Course Evaluation created with Google Forms. You will also see the results of the evaluation in the spreadsheet below. Go ahead and fill out the evaluation form to see the results in real time.
If you are interested in trying this out for yourself the Innovative Educator blog has a great post on using Google Forms. There are step-by-step directions available.
For this project I suggested the use of Google Forms. The great thing about Google Forms is that you can see the results of your survey/quiz in real time. The results are automatically compiled in a Google spreadsheet.
Below is an example of a Course Evaluation created with Google Forms. You will also see the results of the evaluation in the spreadsheet below. Go ahead and fill out the evaluation form to see the results in real time.
If you are interested in trying this out for yourself the Innovative Educator blog has a great post on using Google Forms. There are step-by-step directions available.
October 29, 2010
MassCUE Reflections
This year's MassCUE conference was a very enjoyable day. It was great to be able to reconnect with past colleagues as well as meet many new individuals. It was great to talk with administrators, teachers, technology coordinators, and more. Some of the highlights for me were:
- The high school resources that Malissa Northup shared - I'll be sure to checkout GoAnimate and the NCES Online Graphs.
- Robin Talkowski, Rachel Fawson and Alison Breaux shared some great Language Arts resources to use with middle school students - I'll be sure to check out Storybird and Tikatok to create online books.
- I was also able to learn more about the advanced features of Diigo. I would like to use the "Teacher Console" more with teachers and students. Having access to a teacher account in Diigo is a real benefit. Diigo has certainly helped me transform my bookmarking practices.
- Mary Beth Bergh and Susannah Remillard really made podcasting come alive with their Mystery Theater Podcasts. They even had everyone participate during the session. Mary Beth has documented the whole project on her blog.
October 11, 2010
Which technology tool should I use?
Too often teachers and students are faced with the question "Which technology tool is the best option for the project I'm working on?" In the schools I work in, this question often surfaces when students begin to work on multimedia projects. I often explain to both teachers and students that it isn't as much about the tool as is the learning outcome.
For example when completing a multimedia presentation teachers and students are presented with endless options. Here are just a few:
Another point to keep in mind is that some programs are Mac specific and some are PC specific. If a teacher would like to avoid this conflict all together they can choose a "cloud-based" program like Animoto or 280 Slides. Choosing a cloud-based program also allows students the option of continuing work on their project from home (as long as they have an Internet connection).
If teachers have the luxury to pick from several tools it is also important to acknowledge that each tool has its strengths and weaknesses. Some are great for group collaboration, while others are better suited for the individual contributor. Some are feature rich, while others have a limited tool set. In the end there really is something for everyone. Just remember it should always be about the learning experience!
For example when completing a multimedia presentation teachers and students are presented with endless options. Here are just a few:
- PowerPoint
- Keynote
- 280 Slides
- Animoto
- SlideRocket
- Google Presentations
- iMovie
- Movie Maker
- Photostory
Another point to keep in mind is that some programs are Mac specific and some are PC specific. If a teacher would like to avoid this conflict all together they can choose a "cloud-based" program like Animoto or 280 Slides. Choosing a cloud-based program also allows students the option of continuing work on their project from home (as long as they have an Internet connection).
If teachers have the luxury to pick from several tools it is also important to acknowledge that each tool has its strengths and weaknesses. Some are great for group collaboration, while others are better suited for the individual contributor. Some are feature rich, while others have a limited tool set. In the end there really is something for everyone. Just remember it should always be about the learning experience!
September 18, 2010
Fun with Blabberize
Blabberize is a clever way to have fun with photos. Users define where a mouth should be on their photo. Next, the user adds audio. The mouth then moves with the user's voice. Finished projects can easily be embedded on a website, wiki, blog, or simply by sharing the URL.
Students could use Blabberize to tell a story through the mouth of a historical figure, debate as a politician, narrate a poem, and so much more!
Here's my first attempt at using Blabberize.
Students could use Blabberize to tell a story through the mouth of a historical figure, debate as a politician, narrate a poem, and so much more!
Here's my first attempt at using Blabberize.
September 17, 2010
A great collection of Web 2.0 Tools
Discovery Education released a "Web 2.0 Challenge" document that includes a collection of educational Web 2.0 tools that can be used across the curriculum. The goal is to get teachers and students to try some new Web 2.0 tools. Each page of the document includes a new tool with suggestions for use within the classroom. Also check out the additional tools listed in the Classroom Resources section of the Discovery site.
Discovery Web 2.0 Challenge
September 10, 2010
21st Century Skills
I enjoyed reading the article "Who needs 21st Century Skills Anyway?" by Greg Limperis. Check it out!
edtech_limperis_21stcskills
September 5, 2010
Using the Google Gadgets Editor
Recently I tried to add a Google Reader blog bundle gadget to my website which is hosted by Google Sites. I tried many times to use the "Embed gadget" to embed the bundle in my site. I thought this would be a pretty painless process because normally it only requires copying and pasting the embed code. With Google Sites this wasn't the case. After several failed attempts to embed my gadget, I did some searching on the web to see what I could find. It appears that Google Sites offers minimal support for JavaScript based gadgets.
I found a great "how to" article that gave me the steps to add JavaScript Contents to Google Sites with the Google Gadget Editor.
Here are the directions I followed to insert my blog bundle gadget into Google Sites using the Gadget Editor:
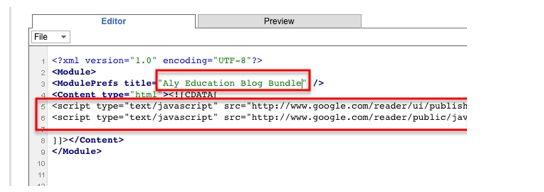
1. Navigate to the Gadget Editor. Scroll down to the bottom of the page to the live editor and replace "Hello World!" script with embed code from custom gadget (e.g. GR blog bundle) - example below
I found a great "how to" article that gave me the steps to add JavaScript Contents to Google Sites with the Google Gadget Editor.
Here are the directions I followed to insert my blog bundle gadget into Google Sites using the Gadget Editor:
1. Navigate to the Gadget Editor. Scroll down to the bottom of the page to the live editor and replace "Hello World!" script with embed code from custom gadget (e.g. GR blog bundle) - example below
![]() |
| Shows Hello World! sript |
![]() | |||
| Shows Hello World! script replaced with my JavaScript |
2. Next choose File, Save As and name the xml file
3. Click on the new xml file to access the new url.
4. Go to Google Sites and choose to add gadget by URL.
5. Now your JavaScript based gadget should appear on your page.
August 28, 2010
Phonecasting to the Internet
This evening I had the unique experience of trying out my very first phonecast using iPadio. With iPadio you can register a phone number(s) then use one of the registered numbers to create an audio recording that is posted directly to your online iPadio account. The audio files ('phlogs') are available as mp3 files and can easily be downloaded, embedded in a webpage or blog, or you can create an RSS feed of your phonecasts. The whole recording process was a breeze!
Subscribe to:
Posts (Atom)